The 20K Project: Huge electrical upgrade & new dinette | Winnebago Ekko
Posted By

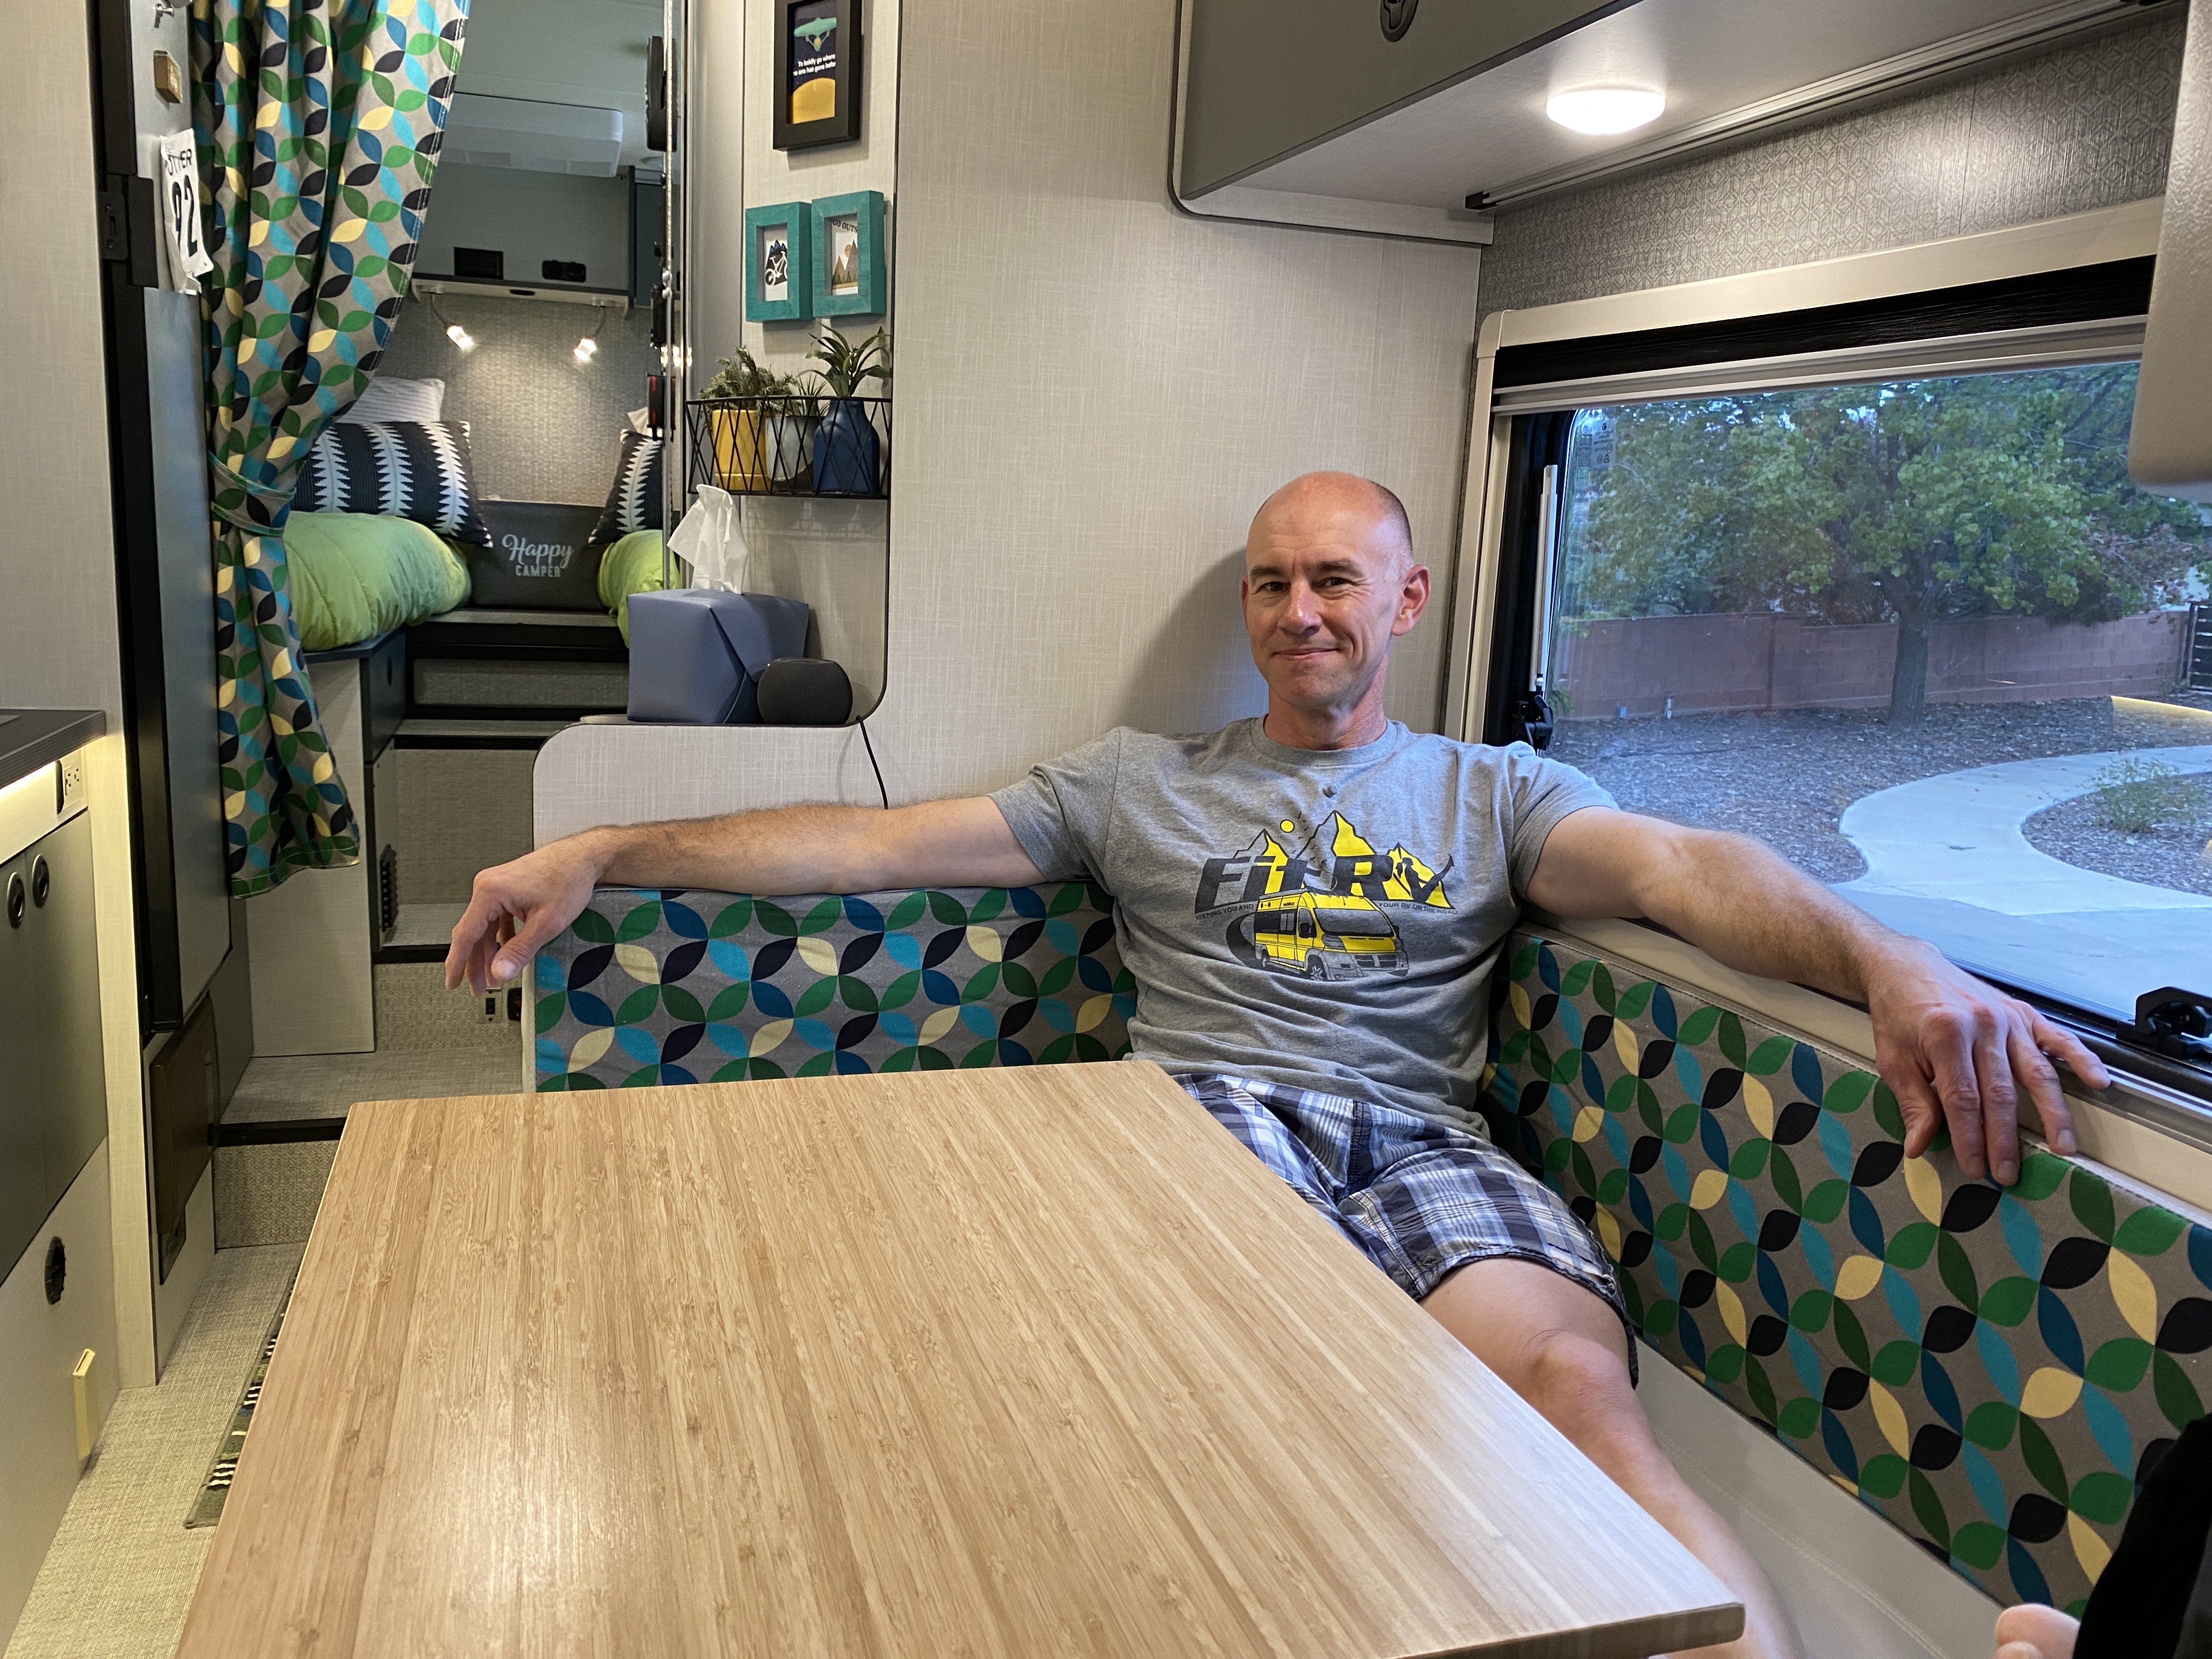
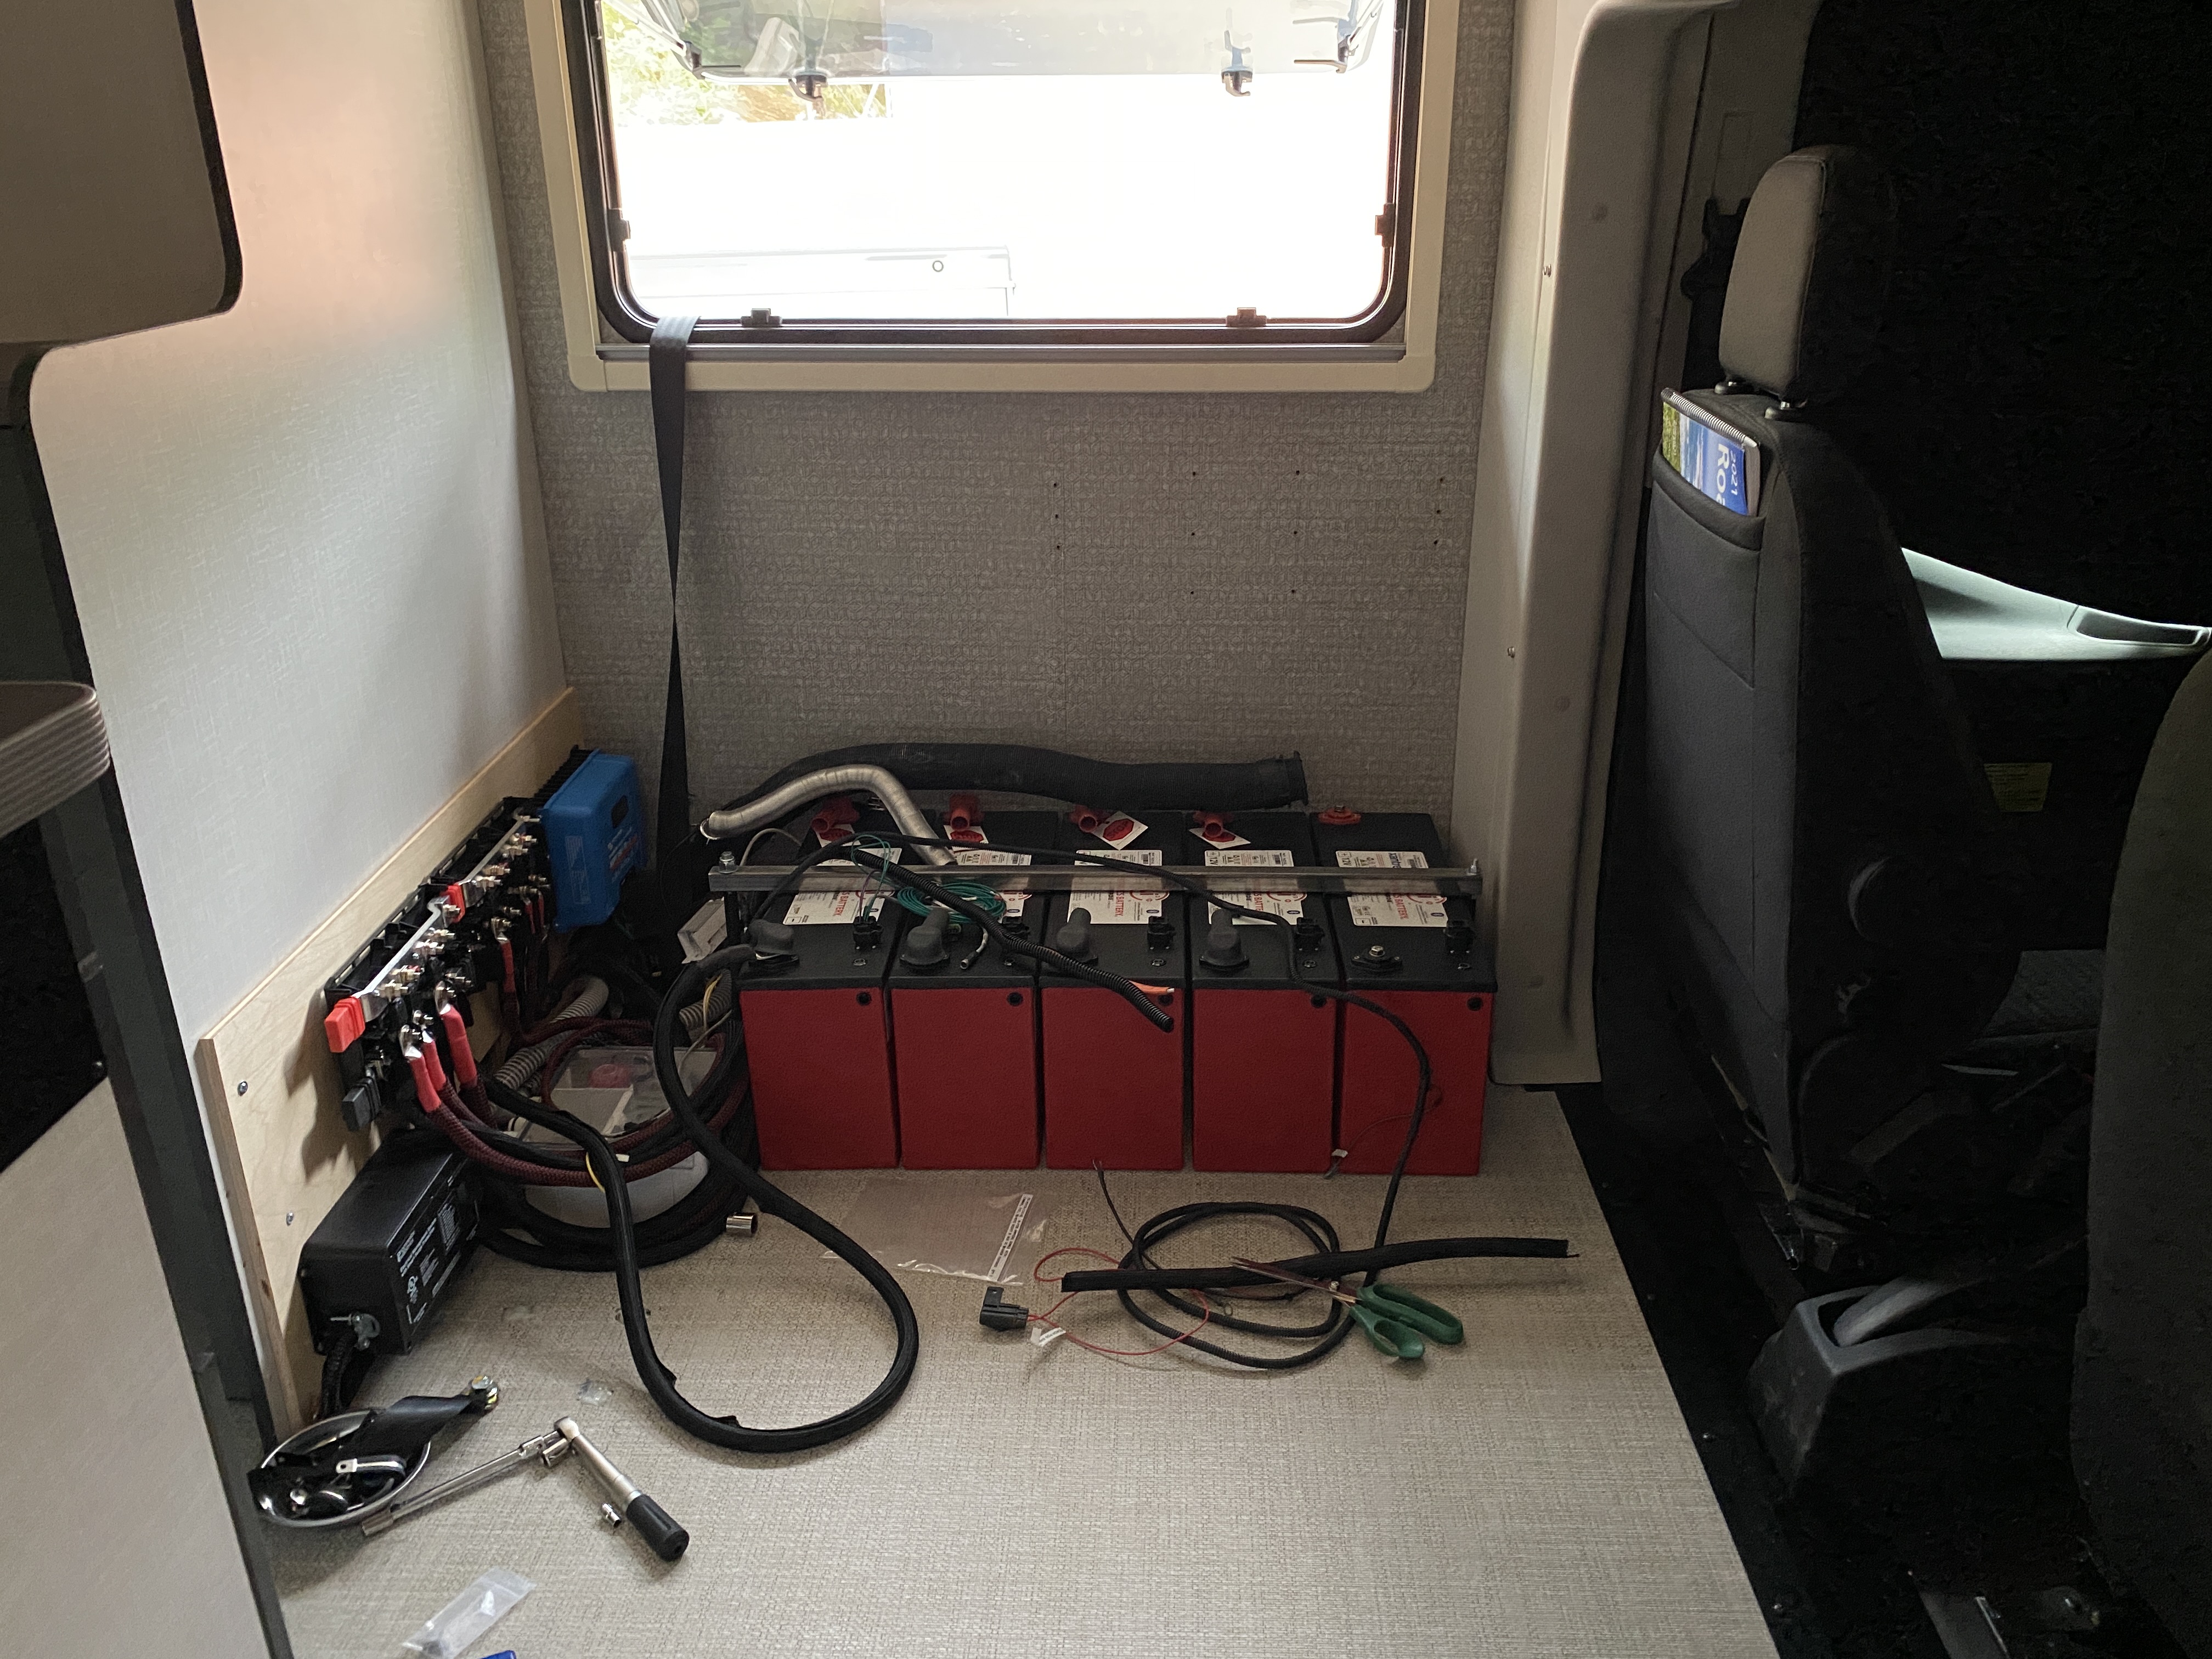
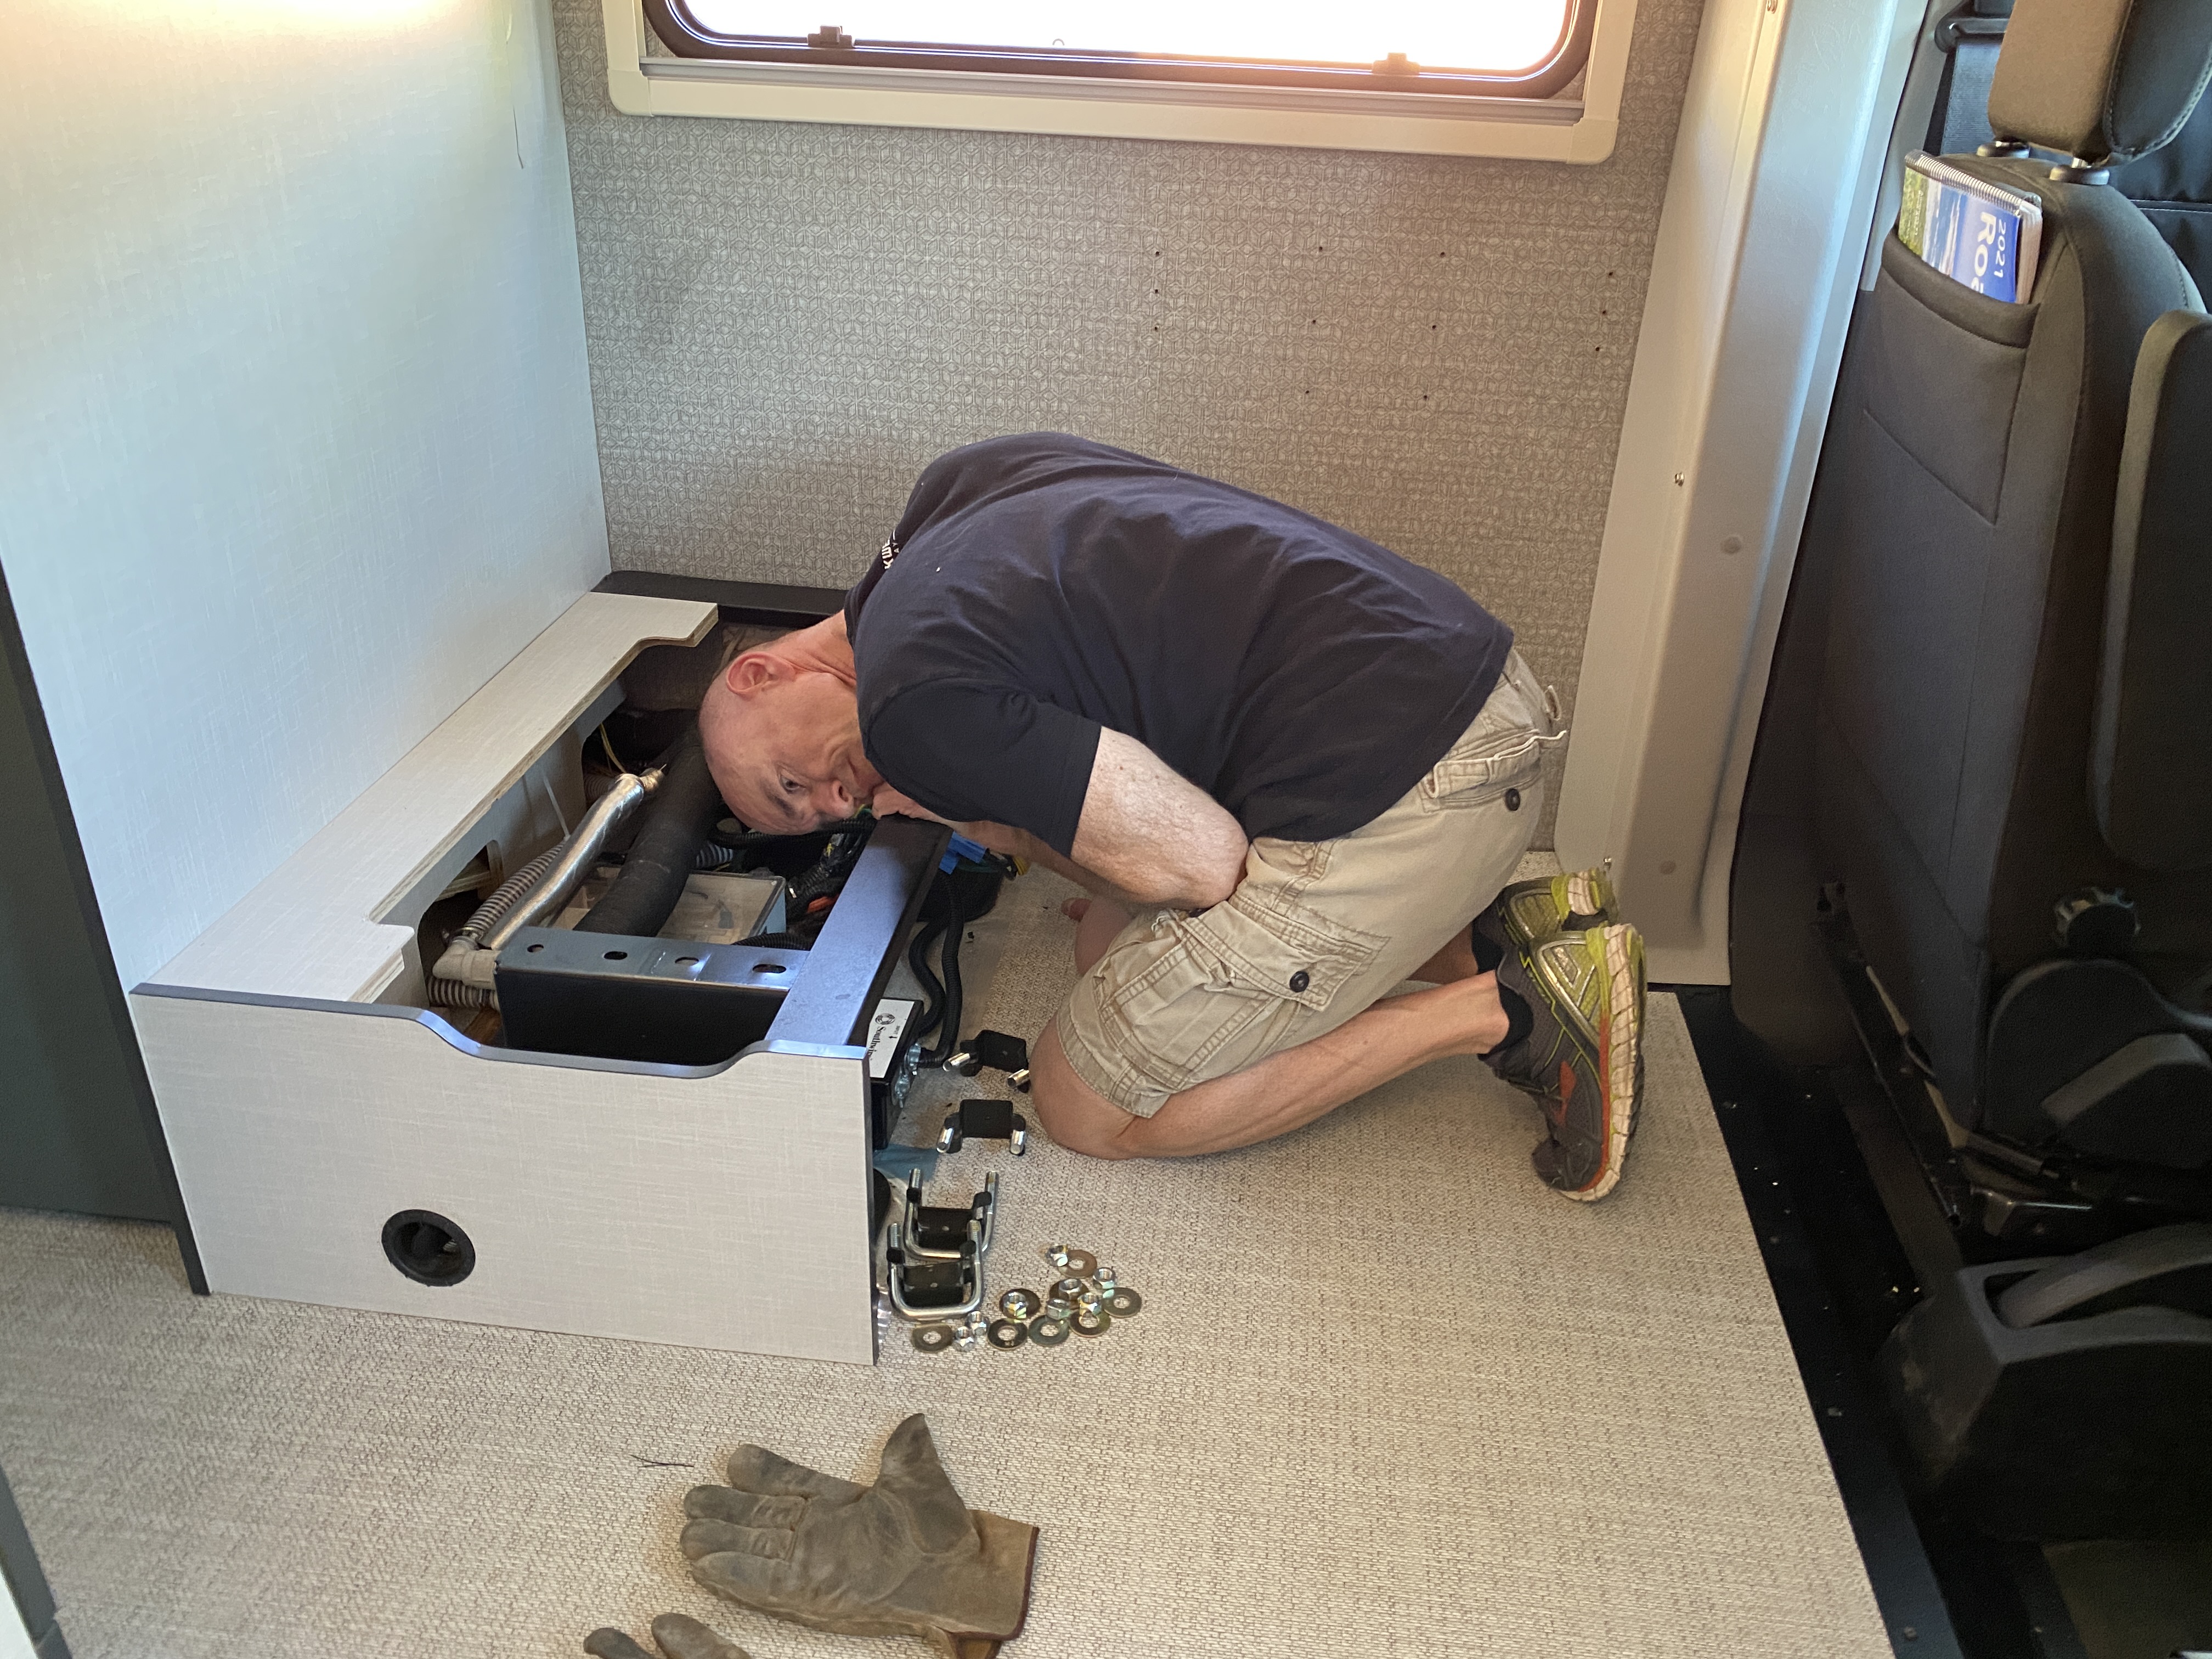
This is the mod to top all mods I’ve done— and if you know my mods, you know I’ve done some crazy over-the-top things. So saying this is the biggest is sayin’ something! In a nutshell, I completely removed and redesigned the entire electrical system in our EKKO, and upgraded the battery capacity to a crazy 20,000 watt hours in the process. I also gutted the dinette area and rebuilt it with an L-shaped dinette with a super cool, much bigger table. There are actually 4 videos in this project series. In the first one: https://www.thefitrv.com/rv-tips/the-20k-project-part-1-the-plan/ I go over my plan for the whole 20k project. I cover the components and equipment I planned to use to install over 20,000 watt hours (1600 amp hours!) of Lithionics lithium batteries in “Number One”. The second video is where the real work begins: https://www.thefitrv.com/rv-tips/the-20k-project-part-2-electrical-system-tearout/ HOW TO REMOVE EKKO BATTERY: For anyone who ever wants to remove or service their EKKO battery for any reason, there are definitely a couple tricks here. My basic notes on that process are: The front of the inverter/battery compartment needs to be removed to take the batteries out. You can’t remove the retaining bolts cleanly unless you jack the vehicle up about 4 to 5 inches. Be careful with the silver insulation material—it’s sharp. The positive terminal holds the main positive lead and a temperature sensor. There are a few more items attached to the negative battery terminal. The harness for the Lithionics battery data connections may be wired through a hole in such a way that you’d have to cut it to remove it. Safety first; shut down ALL power sources; Alternator, battery, solar, shore power. Even if you do that, you may want to disconnect the engine batteries, because that’s still live in there as well. REMOVING DINETTE SEATS: Removing the seats is pretty straight forward. The seats are held down with U-bolts and 8 heavy duty bolts into nuts welded to the frame. If you reassemble all the parts of just the seat pedestal, you’ll find that they weigh 114 lbs combined. After removing it, I would have no hesitation in putting infants, souffles, whatever into those seats without fear of damage. PRO TIP: I don’t recommend anyone actually try to follow me. But if you do, remember to label literally everything! It’s very confusing to see what is what once it’s been disconnected. The 3rd video in the 20k series is all about the electrical install: https://www.thefitrv.com/rv-tips/the-20k-project-part-3-electrical-install/ Here’s what you’ll see completed in the video: 3D printing and fabricating duct collars for the inverter compartment ductwork. Complete ventilation and ductwork install in the inverter compartment. Fabricate and quality check cable end lugs. Install solar panel port on rear bumper and wire in with main roof solar. Run new 4/0 cable to the second alternator. Make an audible change to the cable wrap I used to save space. Run large-gauge wiring through the coach from inverter to load center. Change plans on battery mounting and mount 5 Lithionics batteries. Fabricate enclosure for 250A breakers (I wound up using two, not one.) Install SmartPlug. Modify load center to accommodate two independent sets of breakers. Remove the power share device. Replace the load center. Build mounting board for Victron Lynx bus bars, solar charge controller, hardwired surge protector. Install inverter/charger. Install all large-gauge 12v components. Install seat belt. Smoke test 12v system with power. (I was prepared for literal smoke…) Try to get away with using the Xantrex 6-conductor control cable for the 8-conductor Victron control panel. Fail at that. Run new 8 conductor ethernet cable for the Victron inverter control panel. Smoke test 120v system. Fabricate trim rings and cover plates for solar switches, propane monitor, and Victron inverter control panel. Re-seal inverter (formerly battery + inverter) compartment with thermostatic fan controls installed. Finish and make work-safe electrical install. In the 4th video, I get to work building the new dinette! https://www.thefitrv.com/rv-tips/the-20k-project-part-4-rebuilding-the-dinette/ Basically, I build an L-shaped bench that’s attached to the structure of the RV. The bench boxes themselves are fairly standard. They’re attached to the RV with angle brackets that I made in-house, and I use those to attach to the walls and floor. The pieces of the bench connect to each other using Festool Dominos, which provide a solid attachment that I can disassemble later if I need to. I did cut all the pieces of the dinette bench using the CNC router. I learned that if you want to cut a rectangle that’s 2mm longer on one side than its opposite, that’s really easy to do with CNC, but pretty hard with just a table saw. I only had to build as far as the bench, and then Stef took over and was in charge of getting cushions and fabrics picked out for it. That’s a very good thing, and you’ll realize why when you look at the finished product. The dinette was finished off with a slick Italian Table Base from Lippert, on top of which I added a bamboo top that I sprayed in-house as well. While I was at it, I made a smaller version of the table top for the passenger-side Lagun table that Stef uses. I also made a couple odds-and-ends pieces for the dinette area (which you’ll see in the video), and wrapped the base of the table as a super-awesome scratching post for Mel. So yeah, it was a lot. But I learned a lot. And I love never worrying about having enough battery capacity when we’re out RVing now. I don’t even bother checking the battery status anymore. Plus the new dinette is the bomb.
Products Used
- Lithionics Batteries
5 Likes
0 Comments3 Shares
Like Save to your Favorites Comment
Share
Mod Specifications
Mod Category
BatteryTotal Time
A few daysSize
Mega ModDifficulty
HardTotal Cost
RV Details
Type of RV
Class CMake
WinnebagoSeries
EkkoModel
Year
2022How to | The 20K Project: Huge electrical upgrade & new dinette - Winnebago Ekko
View helpful step by step instructions on how to complete the “The 20K Project: Huge electrical upgrade & new dinette” mod on a 2022 Winnebago Ekko along with the products and tools that you’ll need to effectively accomplish the job. This Battery mod was considered hard to do and took a few days to complete.
Sign Up or Login to See “How To” Information
Free membership gives you access to all the available “How to” information including how-to videos, step by step guides, tools used, and the ability to ask questions to the user who completed the Mod.
Like Save to your Favorites Comment
Share
Inspiration from Remarkable Renovators


More Winnebago Ekko Upgrades
Best Winnebago Ekko Lighting Upgrades
Best Winnebago Ekko Storage Upgrades
Best Winnebago Ekko Aesthetics Upgrades
Sponsored